Category Archives: Gardening

HOT! Shade, Mulch, Air, Water

It is mid-August and both people & plants are enduring sweltering humid days. Hibiscus are tropical plants, used to humidity but not all-day direct sun & alternating dry/wet soil.

Try to provide shade from noon to early evening, Trees, taller shrubs, trellis, shade cloth, whatever it takes. Hibiscus do not tolerate 100F days in all-day direct sun.

Water regularly, try to avoid soils moisture bouncing back and forth to extremes. Slightly damp is all the plants need, but it needs to be consistent. In other words, just flooding the garden once a week and then letting it dry out.. is bad!

Mulch heavily. That helps keep the soil cool and retails moisture. If you see mildew or fungus on the mulch, stir it up with a rake. In case of major fungus infestations, use fungicides or replace the mulch.

Air! We all want more hibiscus plants and keep adding to our collections. Then the plants grow. Pretty soon, they are all jammed together. When planting, leave plenty of room for plants to grow & spread, then prune to keep adjacent plants from intermingling their branches. This spacing allows air circulation and really cuts back on the spread of insects or fungus infections.

Look after yourself also, wear a hat & cool clothes, drink plenty of water, take regular breaks. Although it might seem obvious, avoid heavy gardening work in the hot parts of the day.

Related Images:

Slugs, yuck!

Slugs can be a persistent problem for hibiscus plants, causing significant damage by feeding on the leaves, flowers, and stems. These nocturnal pests leave behind ragged holes in the foliage and a slimy trail, which is a clear sign of their presence. Here’s how to manage slugs on hibiscus effectively:

Identifying Slug Damage

Slugs generally feed during nightime, so you might not spot them during the day. Signs of slugs eating your hibiscus:

  • Irregular holes in leaves and petals, often with smooth edges.
  • Slimy trails on the leaves, stems, and surrounding soil.
  • Damaged young shoots and flowers, particularly in moist conditions.

Preventing and Controlling Slugs

  1. Handpicking: Manually remove the slugs, easiest to do at night with a flashlight. Dropping them into a container of soapy water is one way to dispose of them.
  2. Barriers: Copper tape, eggshells, or diatomaceous earth sprinkled around the base of the plant can deter slugs. They dislike crossing sharp or dry materials.
  3. Slug Traps: Set up beer traps by placing shallow containers filled with beer at soil level near your hibiscus. This is a shallow tray filled with beer. Slugs are attracted to the beer, fall in, and drown.
  4. Natural Predators: Encourage natural predators like birds, frogs, and ground beetles to inhabit your garden.
  5. Organic Slug Baits: Iron phosphate-based slug baits are effective and safe for pets, wildlife, and the environment. Scatter the bait around the base of the plants.
  6. Moisture Management: Slugs prefer moist conditions. Avoid overwatering. Wwater in the morning to allow the soil to dry by evening.

Long-Term Solutions

  • Remove Hiding Places: Remove debris & fallen leaves. Rake mulch to aerate and expose hiding slugs to sunlight & dry air.

Slug Safety

Slugs are not generally poisonous or toxic to humans and are relatively safe to handle. However, they can carry harmful parasites or bacteria. So, it is a good idea to wear gloves when picking them off hibiscus, and wash hands thoroughly afterwards.

Although it is very difficult to completely eliminate slugs, these methods can reduce slug damage to your plants.

Related Images:

Mosquito Control

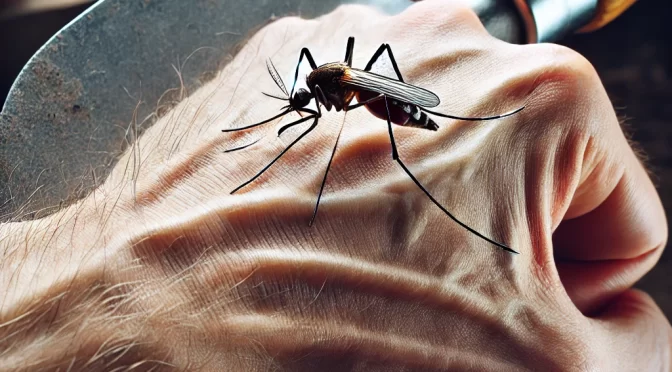
Mosquitos are terrible right now, mostly because they have had lots of water to breed in lately. Swarms of the biting bugs can make gardening chores miserable.

Mosquito control advice always includes emptying any containers that contain open water

If you have potted plants in trays with water, add gravel or sand around the pot. Use enough to cover all open water in the tray.

For ditches, flooded yard areas, anything that really must have standing water in it, a little bit of oil will form a floating surface slick that suffocates mosquito larvae.

Add one-quarter teaspoon of oil (vegetable oil, horticultural oil, Neem, common mineral oil) per gallon of water, or use 1 tablespoon per 100 square feet. Replenish every few days as the oil slick disappears.

Related Images:

Spring Cleaning Time!

Spring has come early to the Gulf Coast, with early March temperatures in the high 70’s & 80’s.  In the Houston area south of I-10, many yards never had a hard freeze this winter, and hibiscus plants are throwing out new shoots and early flower buds.

To encourage those hibiscus plants to bloom, get out the garden gloves and do some Spring cleaning.

First, rake & break-up up the winter’s layer of mulch.  Depending on the type of mulch used, clumps or a hard crust may have formed over the last few months.  Discourage fungus and  root-rot by loosening old mulch so that water and air can penetrate to the soil below.

Weeds are starting to grow, and it is a lot easier to pull out the small weeds now, than wait another month and deal with those long crab crass runners.  Wear gloves.  Accidentally grabbing and pulling something like a bit of thorny blackberry vine can really dampen one’s enthusiasm for gardening.

Before getting down to weed, check carefully for fire-ant nests!  There is nothing quite like kneeling in a fire ant bed while pulling weeds, and the experience is best avoided.

This is also a good time to apply fire ant poison to yards and gardens. In addition to their nasty bites, fire ants “farm” aphids for food and can spread them all over your hibiscus plants.

For those who don’t mind using a moderate amount of chemicals in the yard, a weed preventative may also be applied to help keep weed seeds from starting.

Sometimes it is very difficult to pull weeds in the area along fence lines behind rows of plants.  A weed killer, such as Roundup, can be an easy solution there.  (Be very careful not to get it on any plant you want to live!)   For a more organic solution, plain household vinegar will kill most weeds, although multiple applications might be needed.

To apply liquid weed killer to very specific spots, put a little on a sponge and dab the plant that needs killing.  Sponge-end applicators are also available commercially.

Next, pull out the pruning shears and give your hibiscus plants a critical examination.  Branches starting within a few inches of the ground, or ones that are sagging to the ground, should be pruned close to the trunk.

Be ruthless.  Cutting off an apparently healthy branch might hurt a little now, but is much better than losing the whole plant to fungus or bugs later.

Unfortunately, a wide variety of diseases and insect pests love our tropical hibiscus plants.  To prevent them from taking hold and spreading, plant and prune to allow good air circulation all around & through each plant.

Especially, open up the area around the lower trunk, and prune plants to allow some space between them for airflow.  All branches should be trimmed from the first few inches (at least 4″ to 6″, personal preferences vary)  above ground level.  Spacing plants slightly apart also makes it more difficult for insects to spread from plant to plant.

Note:   few hibiscus varieties are sprawling low-growing types. Such varieties can be planted in pots or even hanging baskets.  Or, use stakes and ties to get branches up off the ground.

Once the garden has been weeded and pruning is done, add some fresh mulch where needed. Mulch holds in moisture, reduces weed growth, and usually provides an attractive contrast to foliage.

This is also a good time to apply fertilizer, but that is a topic for another article.

Related Images: